Auto-Reply Settings for Providers
Overview
The Auto-Reply Settings feature enables providers to set up automatic responses to patients when messages are received outside of the practice's normal operating hours. This guide covers the configuration of Provider auto-reply settings, including message types and customization options.
Auto-Reply Messages
Auto-reply messages are sent when the provider receives messages in the following scenarios:
- Before the practice opens
- After the practice closes
- During the practice's designated lunch hour
Accessing Auto-Reply Settings
There are two main routes to access auto-reply settings:
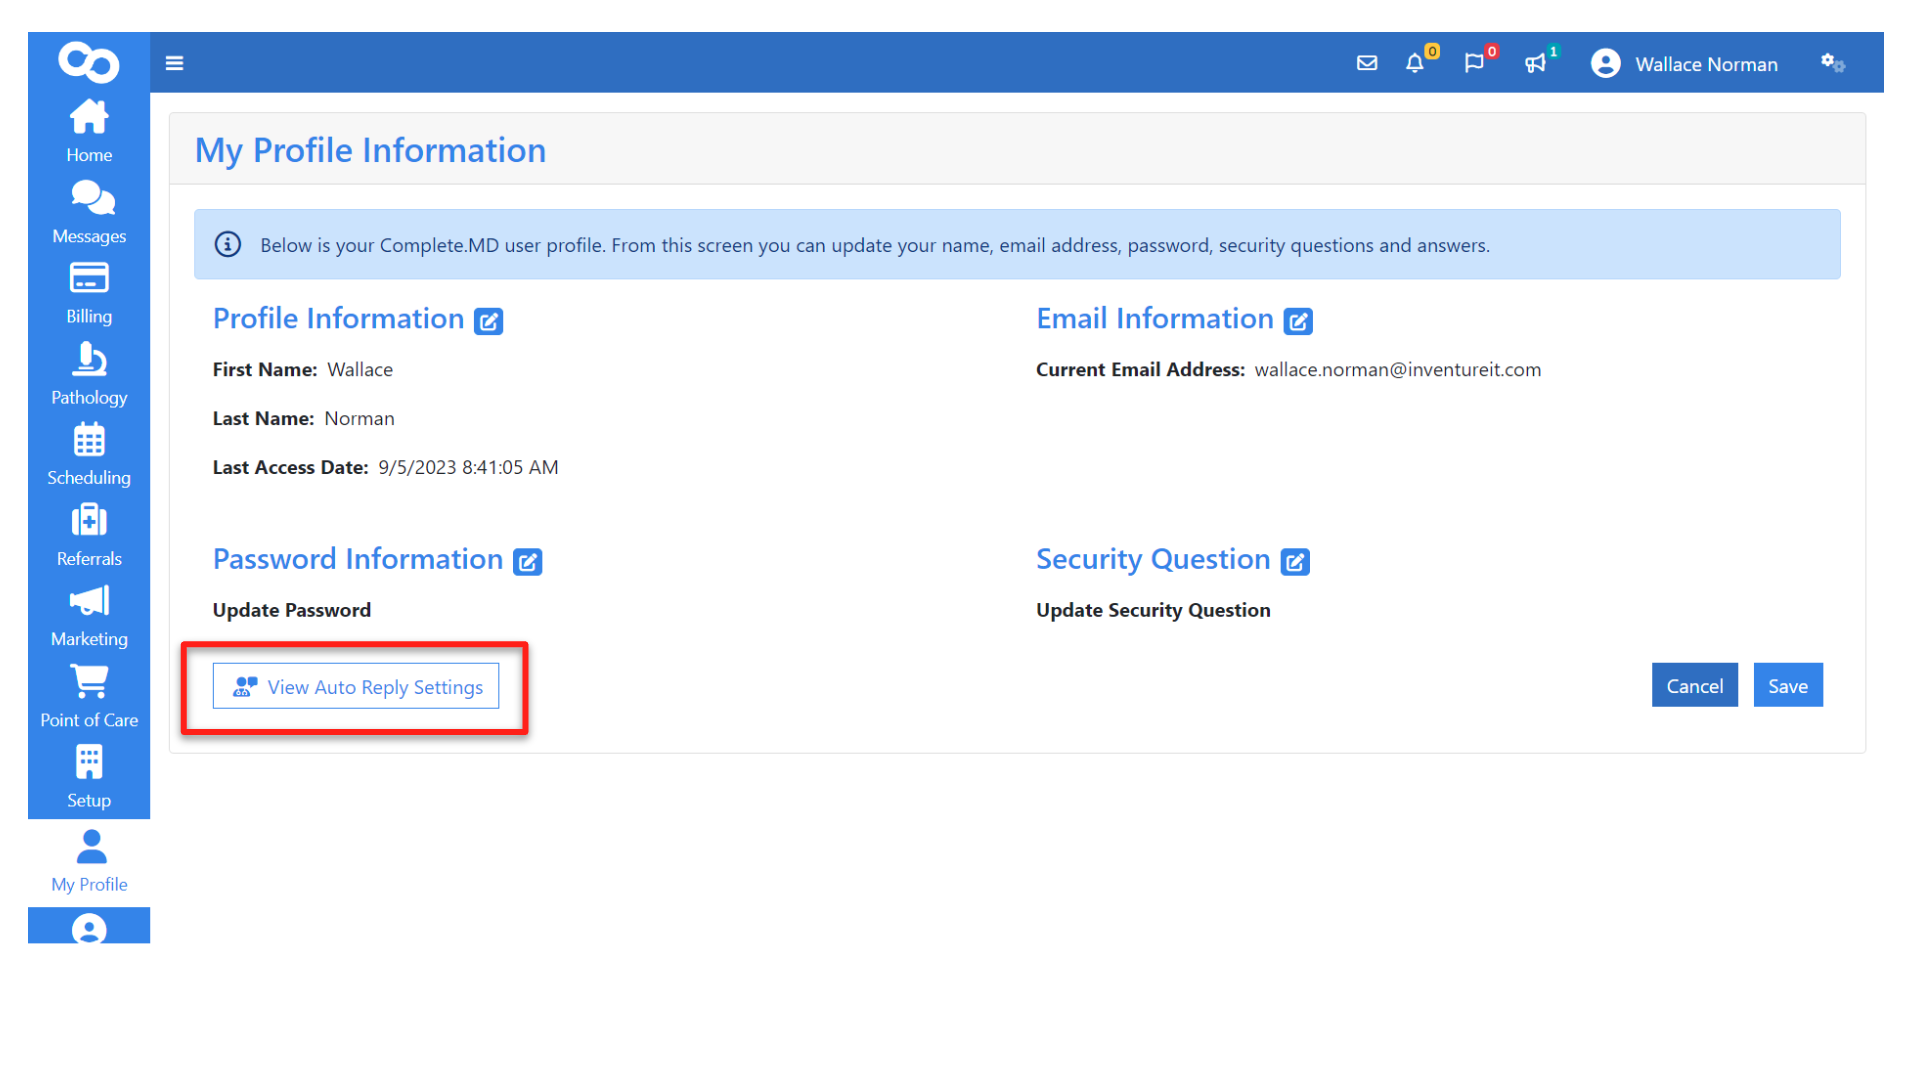
Method 1: My Profile
- Navigate to "My Profile" by clicking on "My Profile" in the sidebar.
- Auto-Reply settings can be accessed by Providers, Delegated Users, and Practice Administrators.
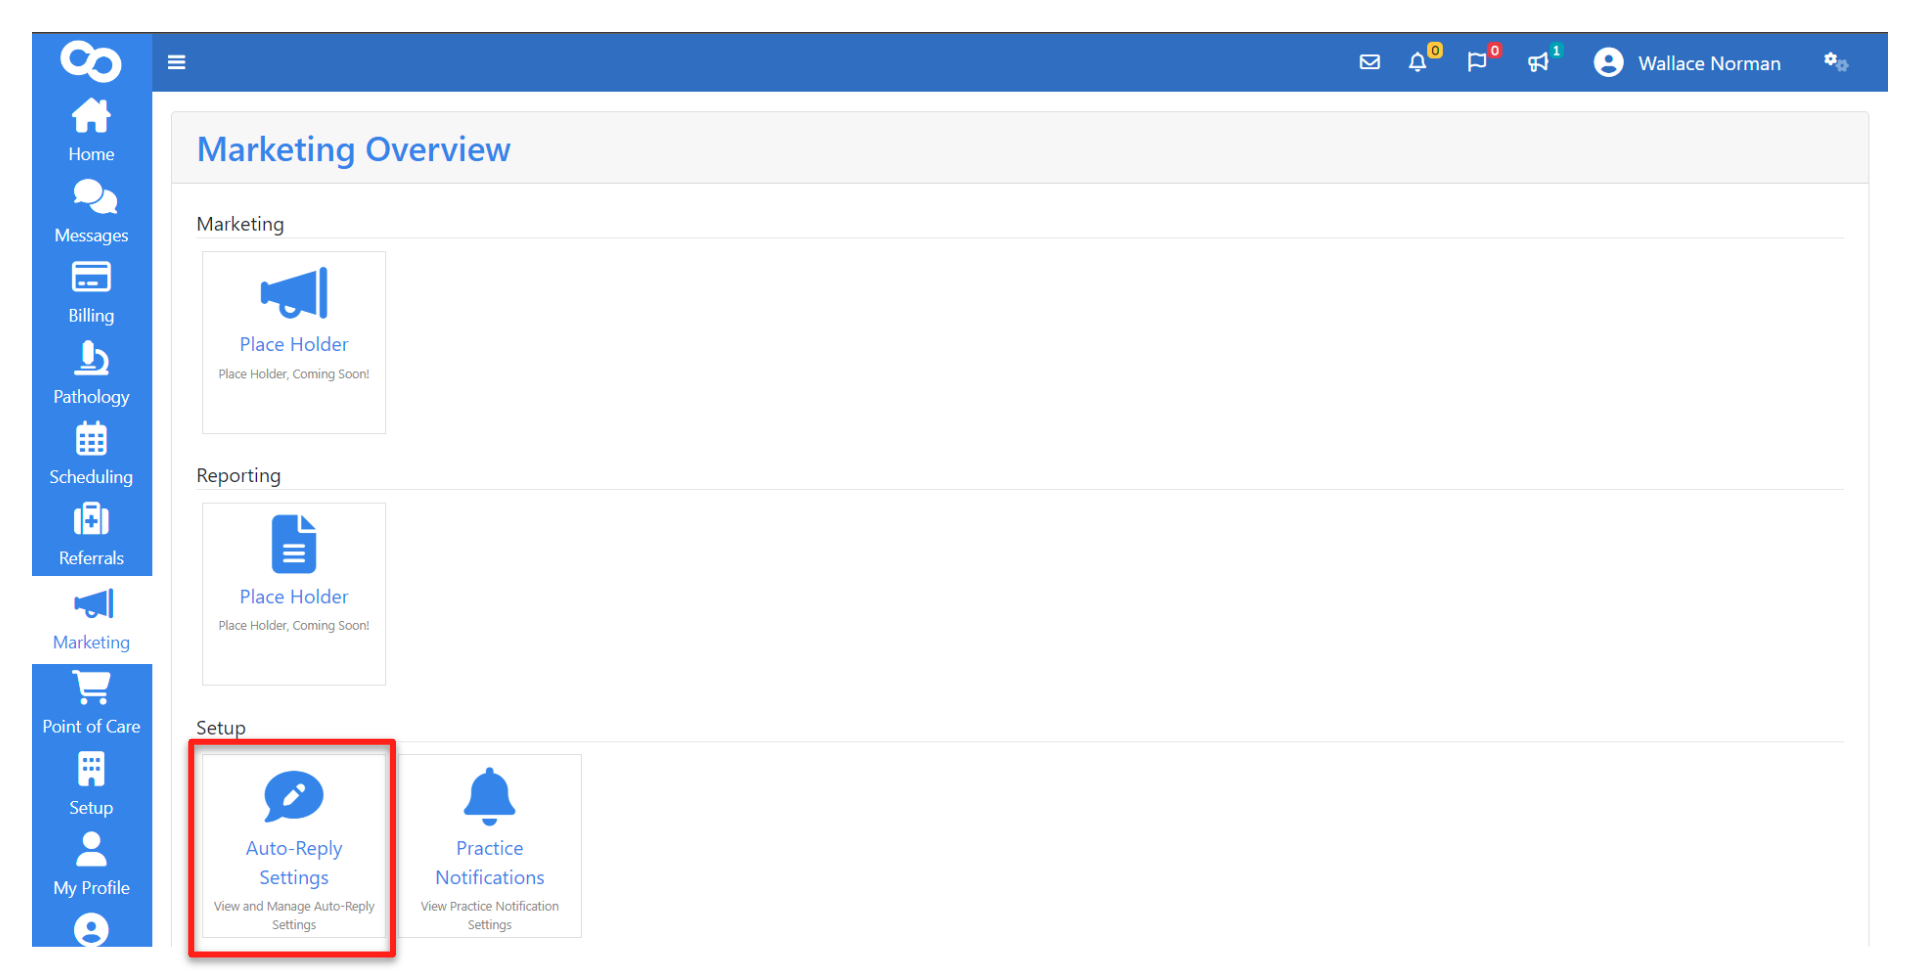
Method 2: Marketing Module
- Go to the "Marketing Overview" by clicking the "Marketing" module in the sidebar.
- Select "Auto-Reply Settings" from the setup section at the bottom of the marketing module.
- "Auto-Reply Settings" can be found at the bottom of the Marketing Overview page.
Setting up Auto-Reply Messages
Follow these steps to configure auto-reply messages for a provider:
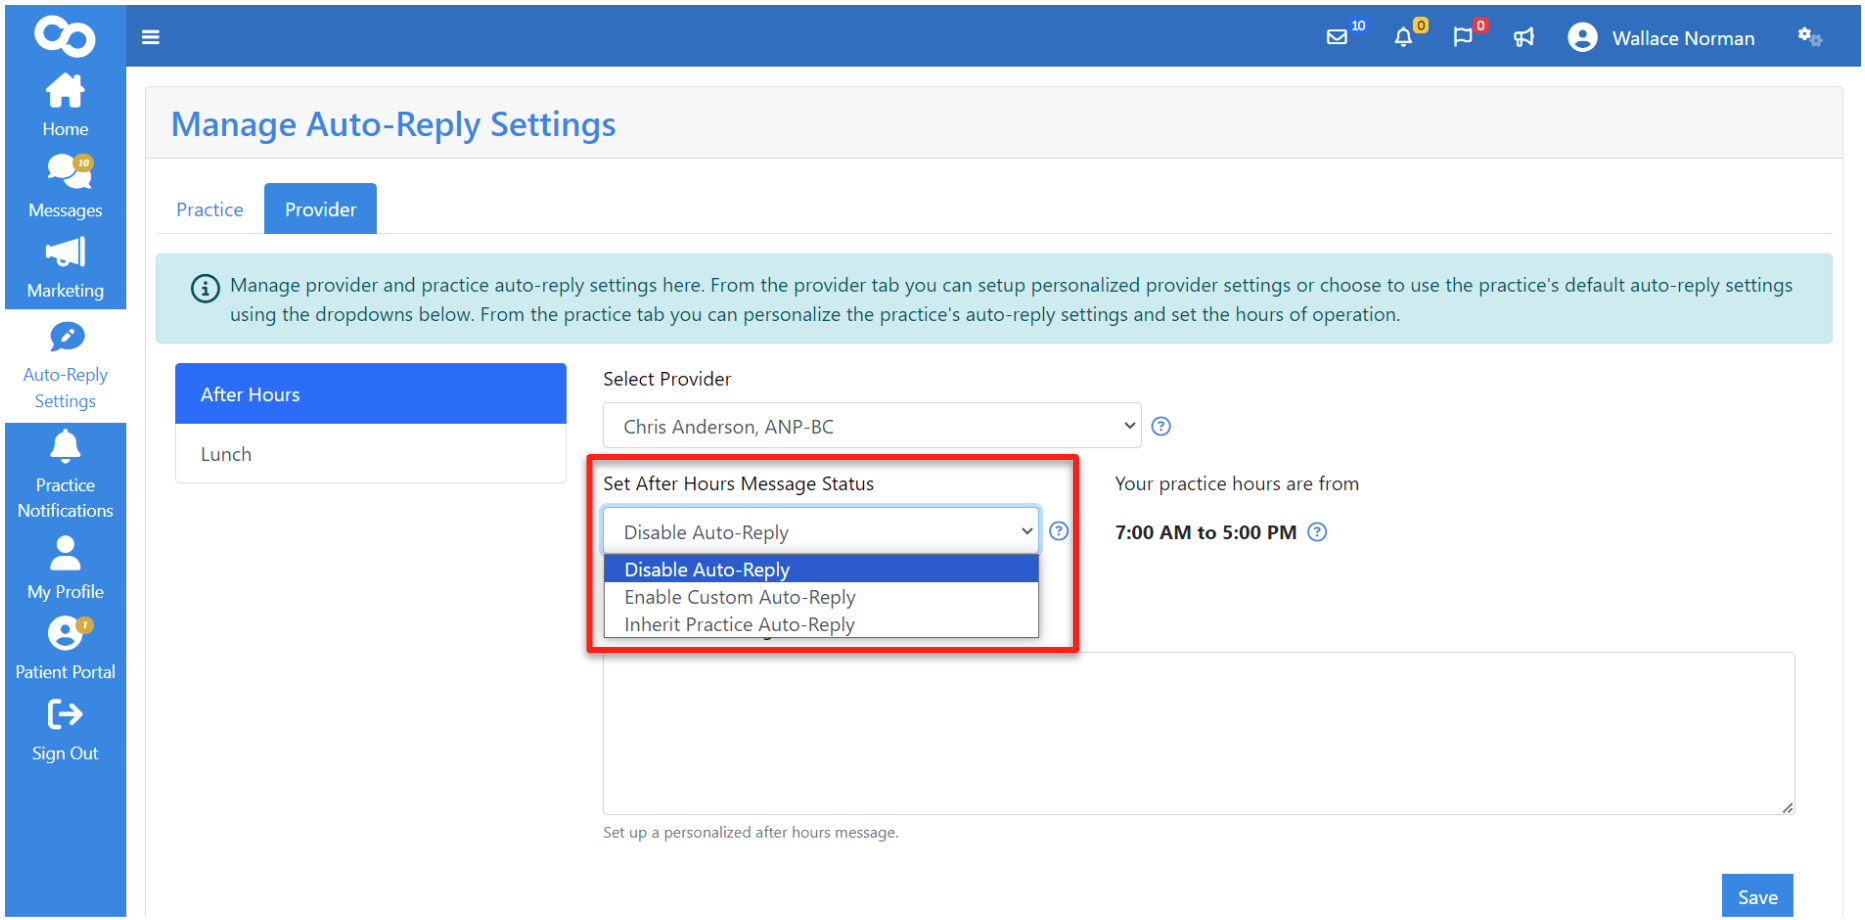
Step 1: Selecting a Message Type
On the left side of the page, you'll find a collection of available message types:
- After Hours: Adjust the provider's after-hours auto-reply message
-
Lunch Hour: Adjust the provider's lunch hour auto-reply message

Screenshot depicting the options for selecting a message type on the left side of the page, including 'After Hours' and 'Lunch Hour' with descriptions, for adjusting the provider's auto-reply messages.

Step 2: Selecting a Provider
The most crucial step is ensuring you have the correct provider selected:
- Practice Admin: Choose from all providers in the practice.
- Delegated User Role: Select providers assigned as delegates.
- Provider Role: Providers can only adjust their own auto-reply settings.
Step 3: Creating a Custom Message and Setting Message Status
Choose one of the following auto-reply statuses:
- Disable Auto-Reply: Turn off the provider's auto-reply feature (applies to custom and practice auto-reply).
- Note: Disabling the auto-reply will disable both the selected provider's custom auto-reply as well as the practice's auto-reply.
- Enable Custom Auto-Reply: Create a personalized message,
- Note: This will override the practice's default option.
- Inherit Practice Auto-Reply: Use the practice's default auto-reply message.
- Note: This option allows the user to use the practice's default auto-reply message instead of a custom auto-reply for the selected provider.